When it comes to surviving Florida’s brutal storm seasons, the strength of your roof lies in the details. High-quality shingles or metal panels often get all the attention. However, a crucial, overlooked component works behind the scenes to keep your home dry. Therefore, understanding the Palm Bay drip edge installation process is vital for any local homeowner.
Furthermore, a missing drip edge quickly rots your fascia boards. Consequently, it invites water straight into your home. At Yeti Roofing, we see this problem all the time on older local roofs.
This guide explains exactly what a drip edge does. In addition, we cover why Florida building codes require it. Finally, you will learn how professionals handle a proper drip edge installation to protect your home.
What is a Drip Edge and Why is a Palm Bay Drip Edge Installation Mandatory?
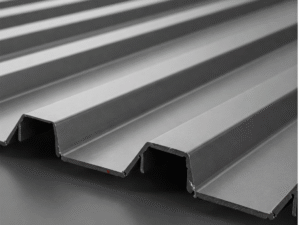
Roofers install an L-shaped metal flashing along the entire perimeter of your roof. We call this a drip edge.
Its job is simple but vital. Specifically, it catches water flowing off your roof. Then, it forces that water directly into your gutters. As a result, the metal channels water away from your fascia boards and underlying wood structure.
Without this barrier, surface tension causes water to curl back under the shingles. Next, it runs straight down your wood fascia. Here on the Space Coast, lacking this metal barrier leads to severe problems:
-
Rotted Fascia & Soffits: First, the wood supporting your gutters acts like a sponge. Ultimately, this leads to expensive carpentry repairs.
-
Water Infiltration: Moreover, moisture seeps behind the gutters and into the attic to breed mold.
-
Gutter Failure: Rotting fascia cannot support the weight of heavy gutters. Therefore, they pull away from the house.
The Yeti Roofing Rule: Never let a contractor reuse old, bent drip edge during a roof replacement. Doing so compromises the structural seal of your new roof.
The Golden Rules of a Proper Drip Edge Installation
If you are paying for a premium roof replacement, your contractor must install this metal correctly. Proper drip edge installation heavily relies on the layer sequence. Moreover, this sequence changes depending on the specific roof section.
1. The Eaves (Bottom Edges)
The eaves are the horizontal bottom edges of your roof where the gutters sit.
-
The Sequence: Roofers must install the drip edge FIRST. They place it directly onto the bare wood decking. After that, they roll the underlayment OVER the metal.
-
The “Why”: Because of gravity. Sometimes water manages to get beneath your shingles. When this happens, it runs down the underlayment. Finally, it sheds safely over the metal drip edge and into the gutter.
2. The Rakes (Sloped Side Edges)
The rakes are the slanted sides of your roof going up to the peak.
-
The Sequence: The crew installs your underlayment FIRST. They extend it to the very edge of the roof deck. Subsequently, they execute the drip edge installation OVER the underlayment.
-
The “Why”: Wind defense. Installing the metal on top creates a secure clamp. Consequently, this prevents severe Florida hurricane winds from driving rain sideways beneath your waterproofing layer.
3. Fastening and Overlaps
-
Nailing: Roofers must secure the metal with roofing nails every 8 to 12 inches. Therefore, it will not buckle or pull up in high winds.
-
Overlaps: When joining two pieces of metal, installers must overlap them by 1 to 2 inches. Furthermore, the uphill piece must always overlap the downhill piece. This guides the water efficiently.
Maintaining Your Roof’s Perimeter After a Drip Edge Installation
A drip edge is highly durable. However, the system around it requires basic upkeep to function properly:
-
Keep Gutters Clean: Gutters often pack with leaves and debris. When this happens, water backs up and submerges the drip edge. Eventually, it works its way under your shingles. Always clean them out before hurricane season.
-
Check After Storms: Look for any loose or bent metal flashing along the roof edges after severe winds.
-
Inspect the Wood: Walk the perimeter of your home regularly. Look for peeling paint or dark stains on your fascia boards. Indeed, this is the first sign of a failing drip edge.
Frequently Asked Questions
How far should the drip edge extend past the fascia? A proper installation extends the metal’s outward kick about 1/2 to 3/4 of an inch away from the board. As a result, this guarantees the water drips completely clear of the wood.
Can you add a drip edge to an existing roof? Yes, but it is a delicate retrofit. A roofer carefully lifts the bottom row of shingles. Next, they break the existing seal to slide the metal underneath. However, replacing the metal during a full roof replacement is always safer and more cost-effective.
Don’t Let Minor Details Cause Major Damage
A failing roof doesn’t fix itself overnight. Perhaps your fascia is rotting. Or, maybe your roof is nearing the end of its lifespan. In either case, you need a contractor who gets the details right the first time.
At Yeti Roofing, we pride ourselves on being your trusted Palm Bay team. We always deliver a flawless installation when you need it most. We specialize in full-scale replacements, precision tear-offs, and premium new installations. Ultimately, we ensure every inch of your roof withstands Florida weather.
Visit yetiroofingfl.com for a free, no-pressure estimate.